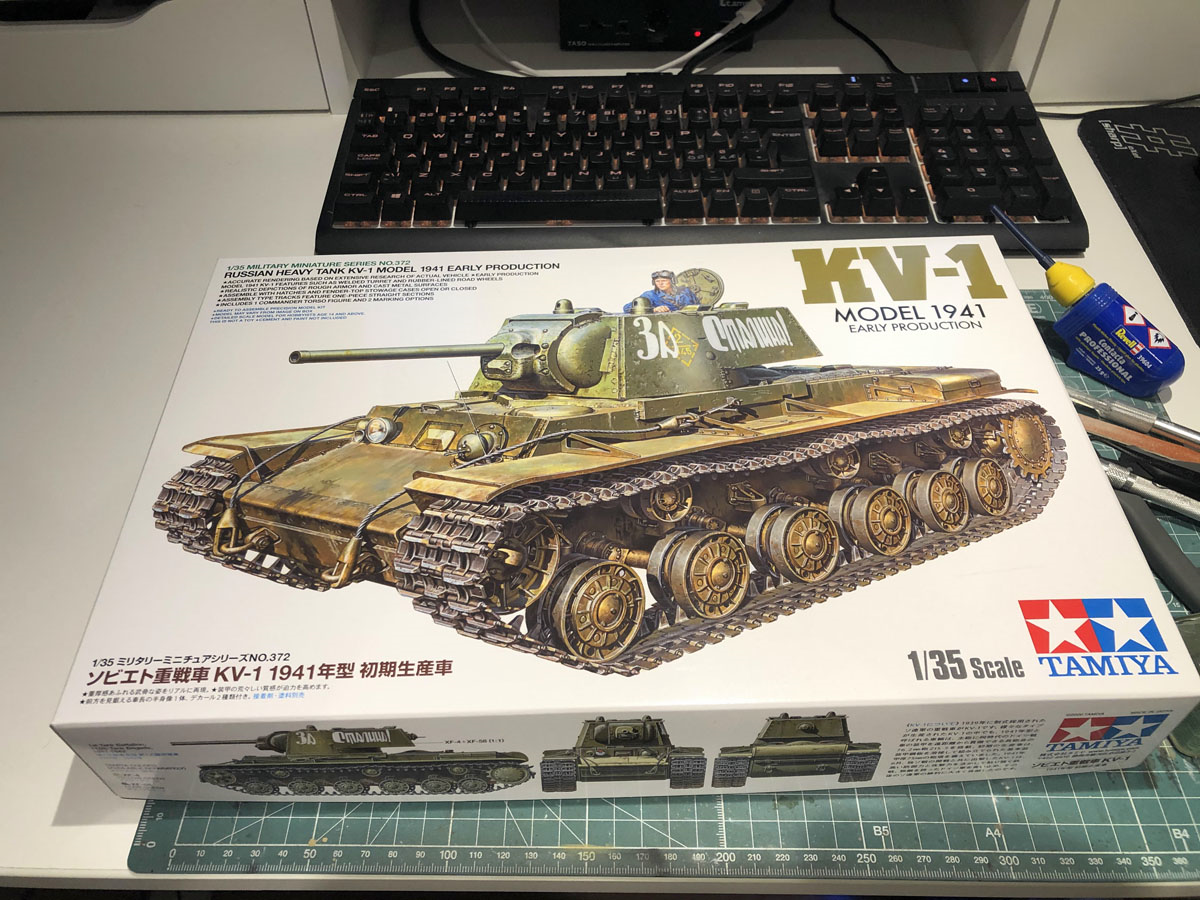
This kit I waited for long. It was almost a year ago when i first heard that there’s a new KV-1 coming from Tamiya. I got mine in August but had several kits more or less started so I waited for a while before starting it.
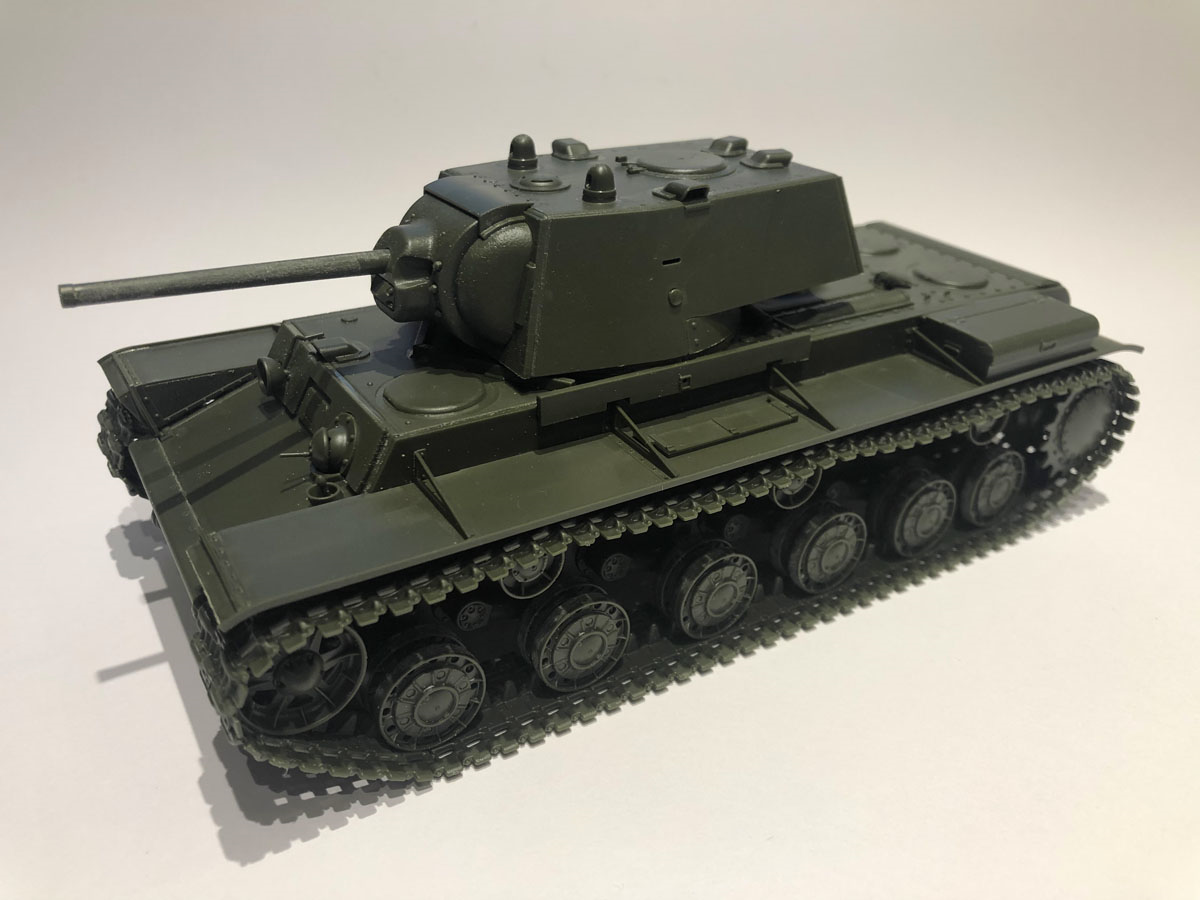
The kit is as good and easy as you might expect it to be. Everything snaps right into place, there’s no cleaning up parts or anything. The one thing I like the most about these newer Tamiya kits are the tracks. They come in large sections where possible and only the bent areas need to be assembled from individual track links. The tracks are nicely detailed and very easy to put together. The sag in the upper part of the tracks looks very nice.
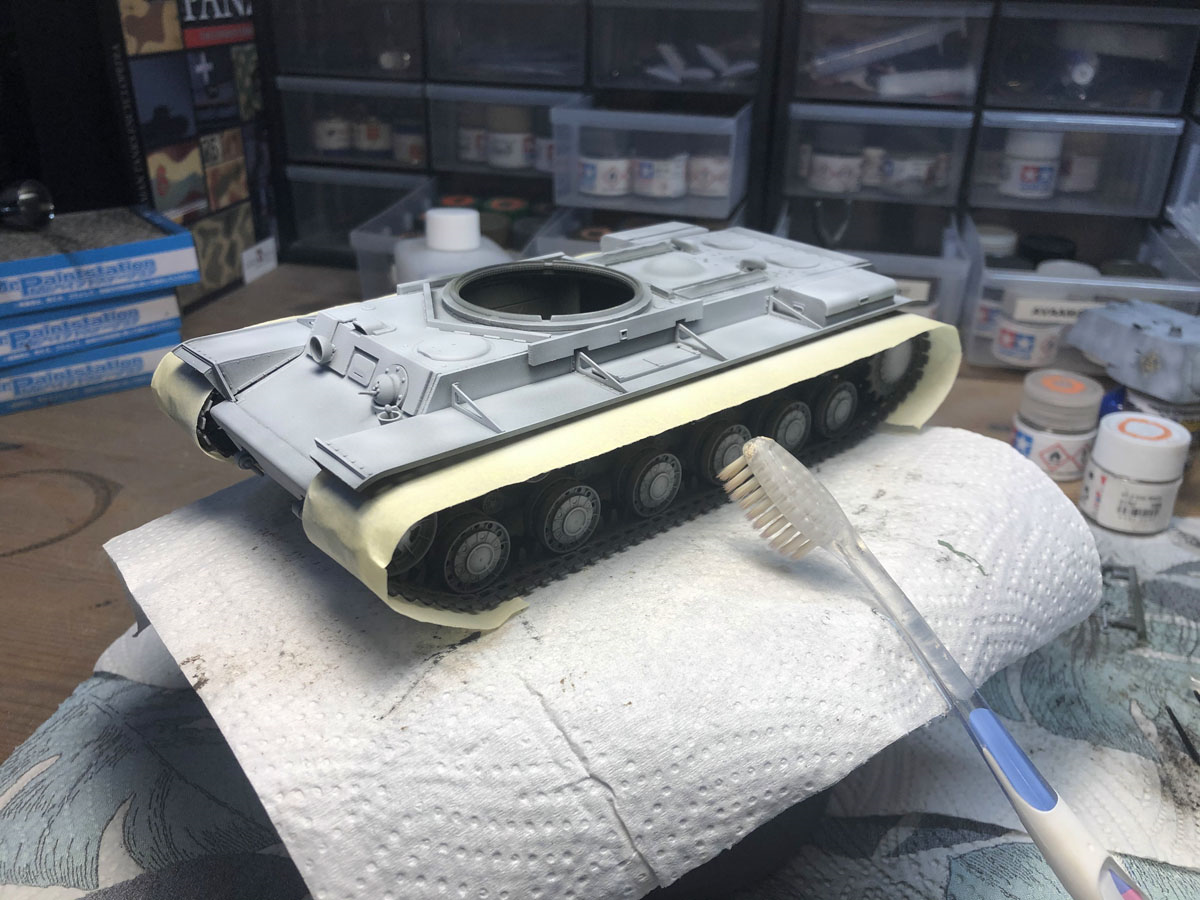
I like to assemble the tracks with the wheels attached to the hull and glue the tracks to the wheels so that I can then detach the entire thing from the hull.
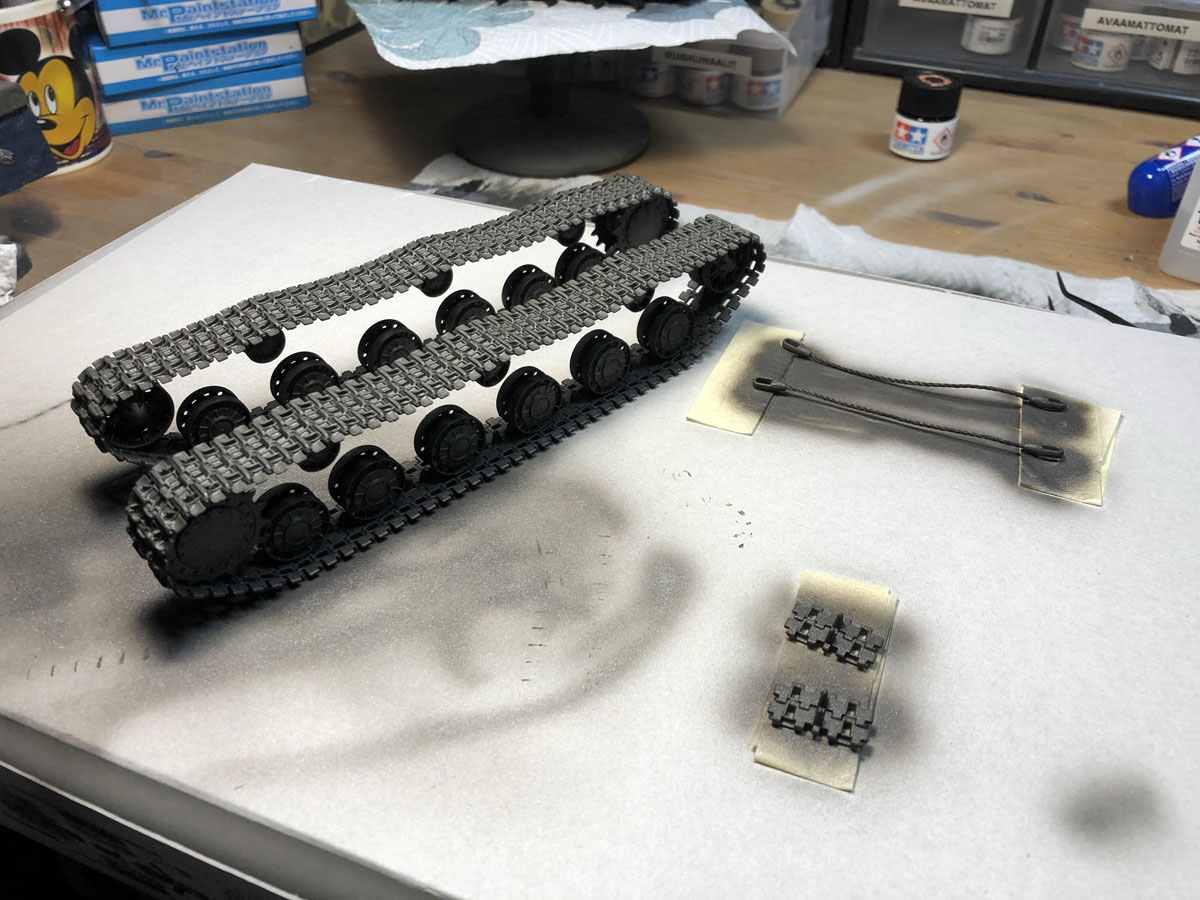
As always I paint the tracks using a mix of 50% flat back, 25% brown and 25% metallic grey. The same applies to extra track links and tow cables.
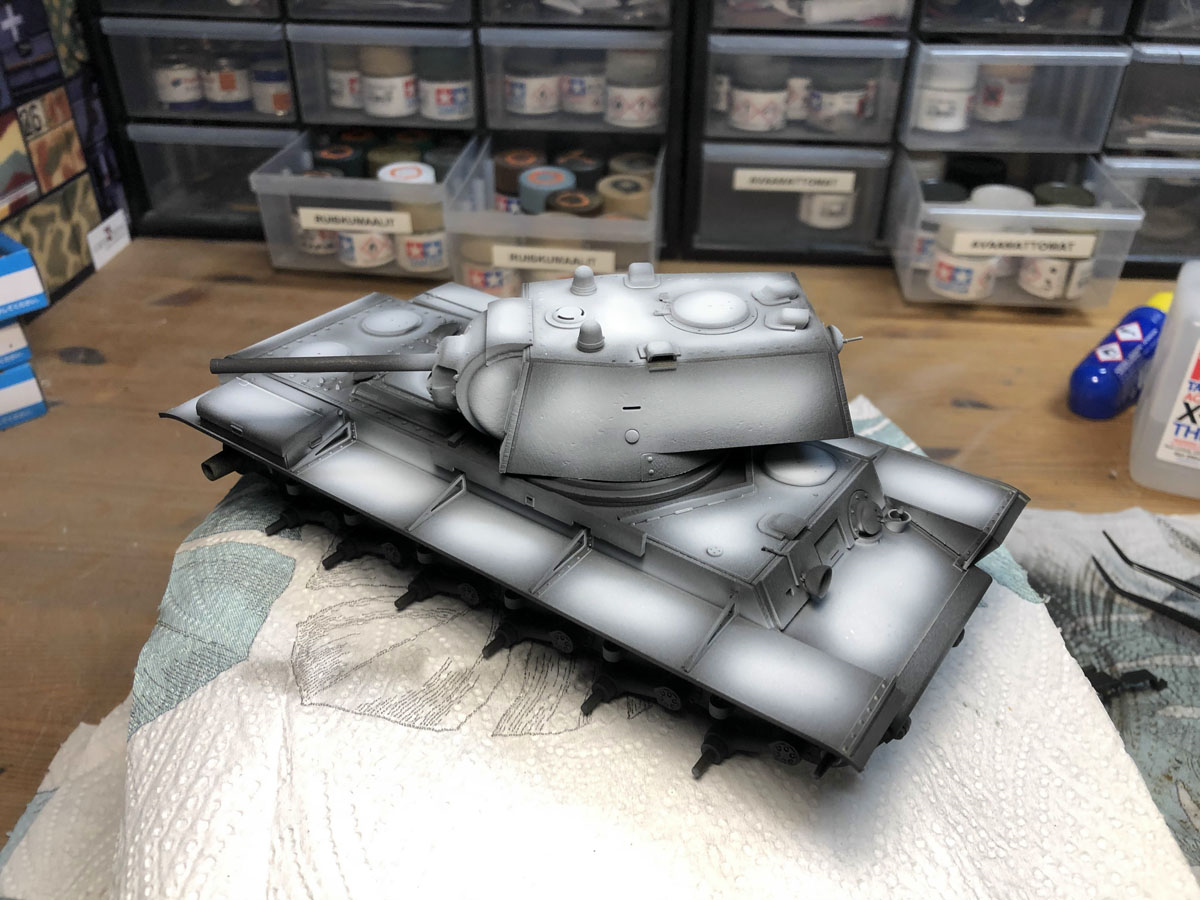
The next routine steps were airbrushing the entire thing with flat black and then flat white to all the flat surfaces.
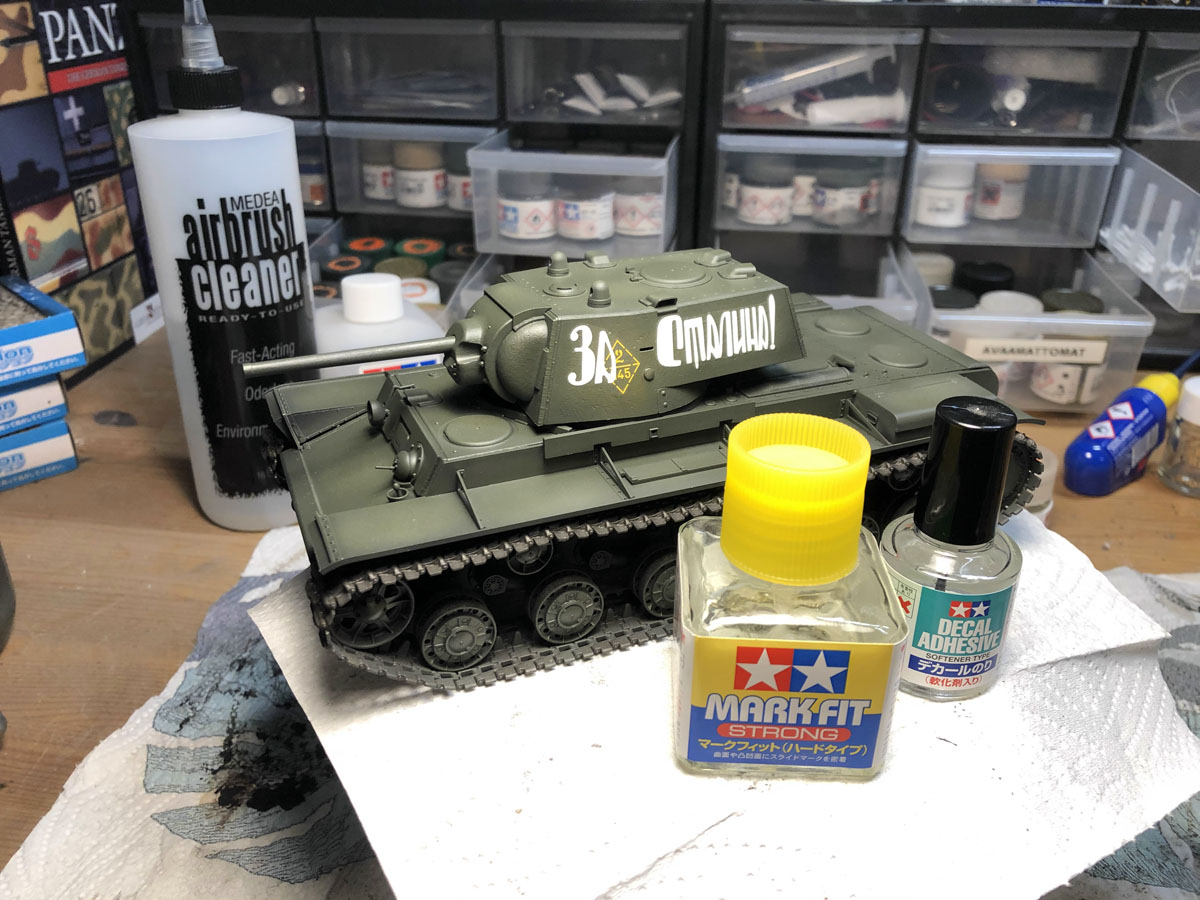
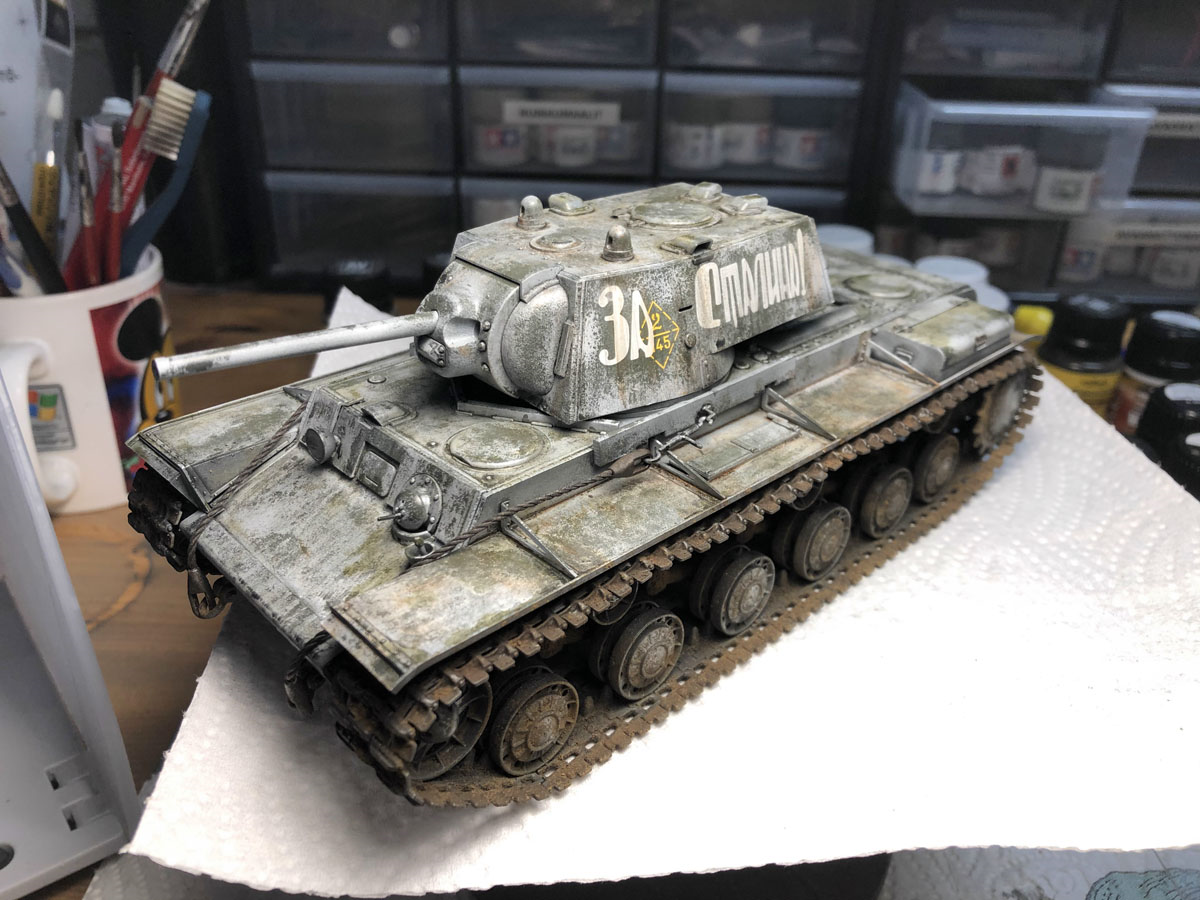
The entire tank was then airbrushed with olive drab which was the standard Soviet color. I tried to go easy to keep the color modulation more visible but ended up airbrushing a little too much of the green. At this point I had not yet decided should I keep the tank green or should I go for a worn winter camo. I applied the few decals this tank has and gave them a proper decal adhesive treatment over night.
I just got the Ammo by Mig chipping fluid so I thought I’d give it a try.
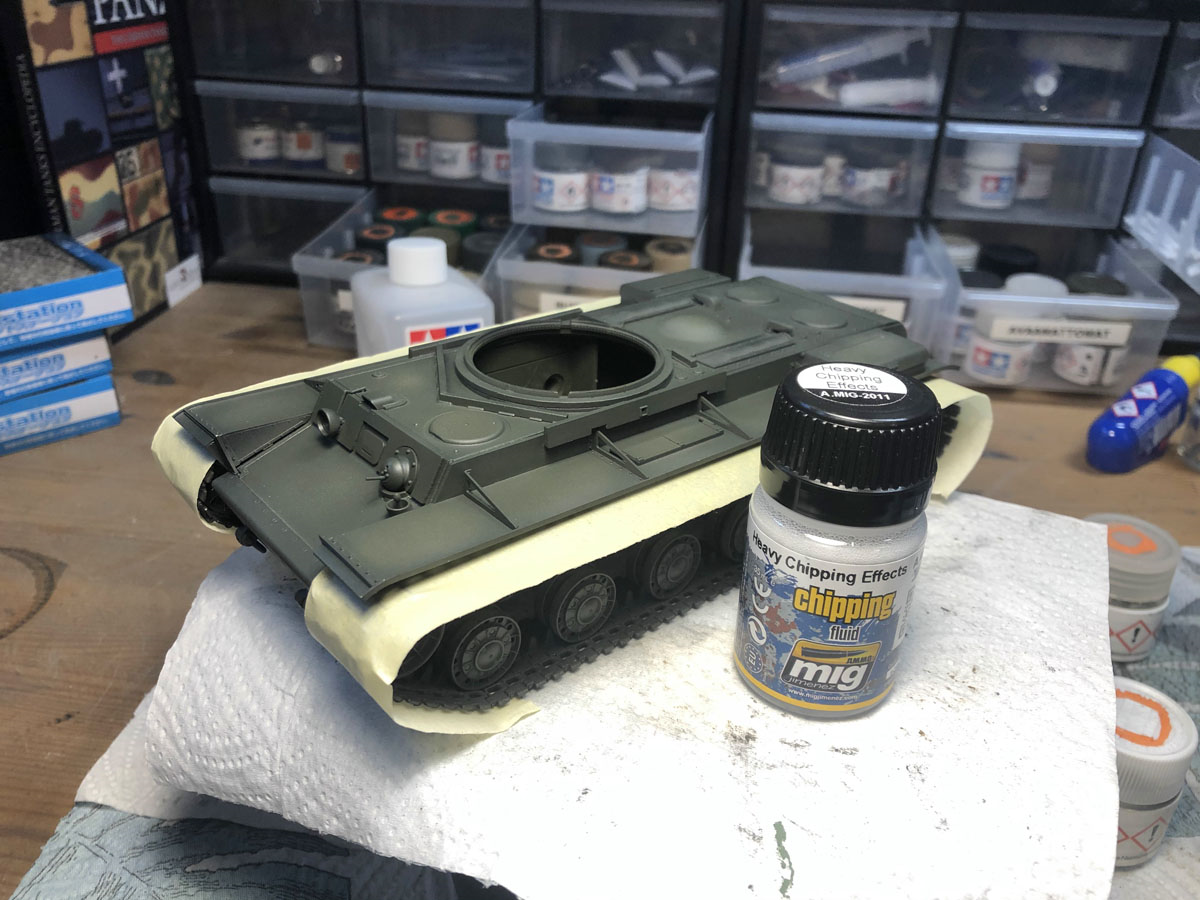
The chipping fluid is super easy to use. It’s fully ready for airbrush use so there’s no need to thin it down. I airbrushed the entire tank with it and left it for 15 minutes or so.
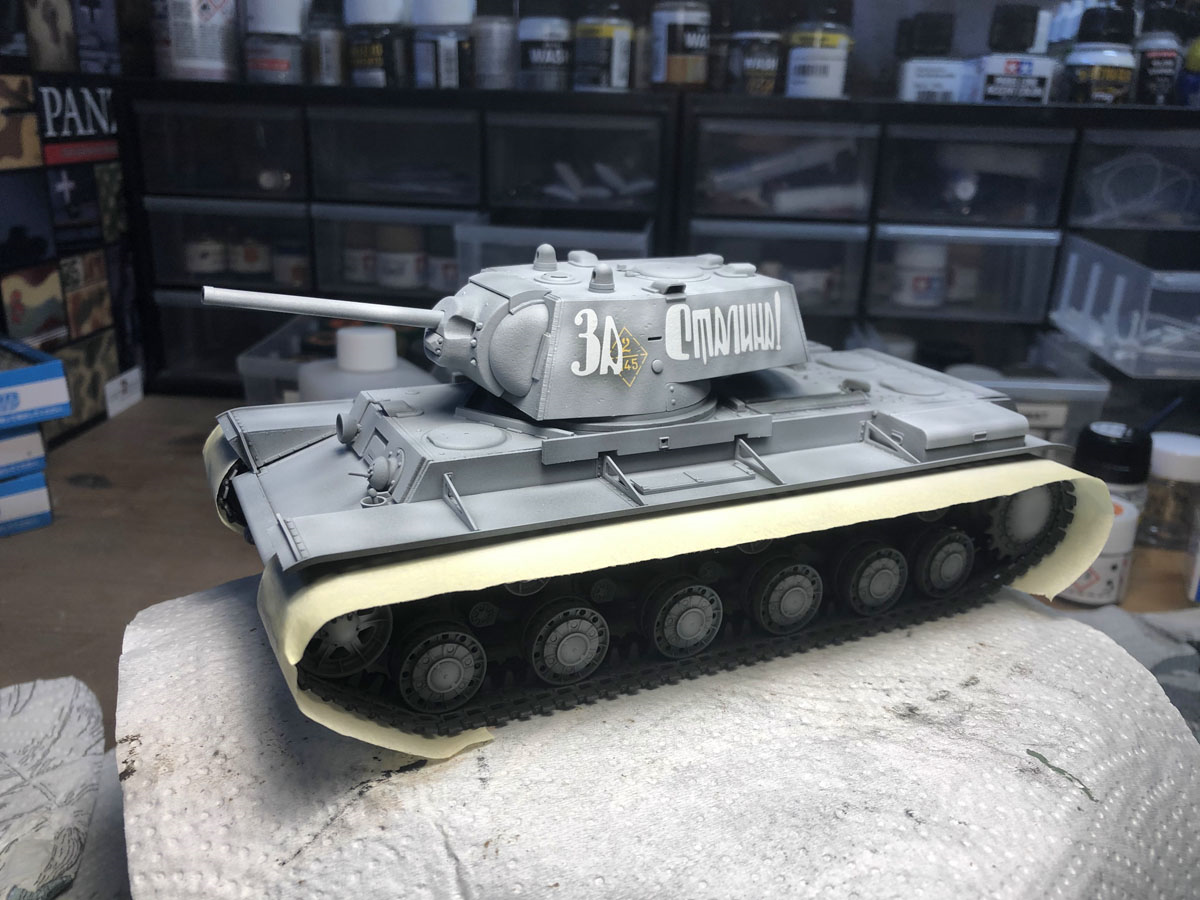
After the chipping fluid had dried it was time for the white. I was thinking should I use nothing but flat white or should I mix some XF-57 Buff to it. I decided not to this time since there was going to be a lot of weathering anyway.
I had done a similar thing with the Tiger almost two years ago. Back then I used hairspray (link).
I intentionally left the decal areas mostly untouched since they would not have been overpainted back in the day.
Once the white was dry it was time to start brushing. I had some warm water and a soft toothbrush. With the hairspray Tiger I really had to brush it but with this Mig chipping fluid and the very thin white coat the paint started coming off really easily. Actually so easy that I’d advise you to be really careful with it not to brush too much away.
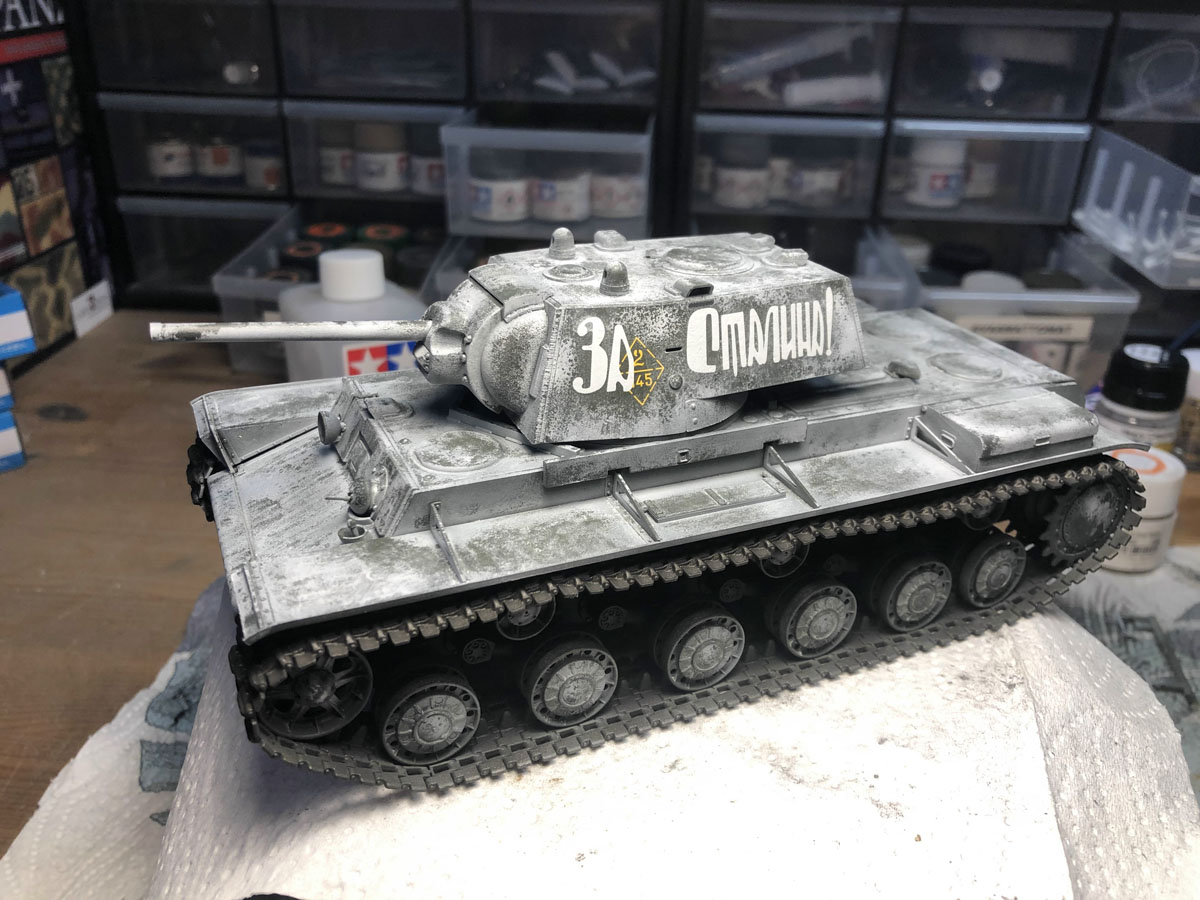
The brushing was really quick and easy and I was very pleased with the result. At this point I wanted to seal everything with a clear coat and proceed to weathering.
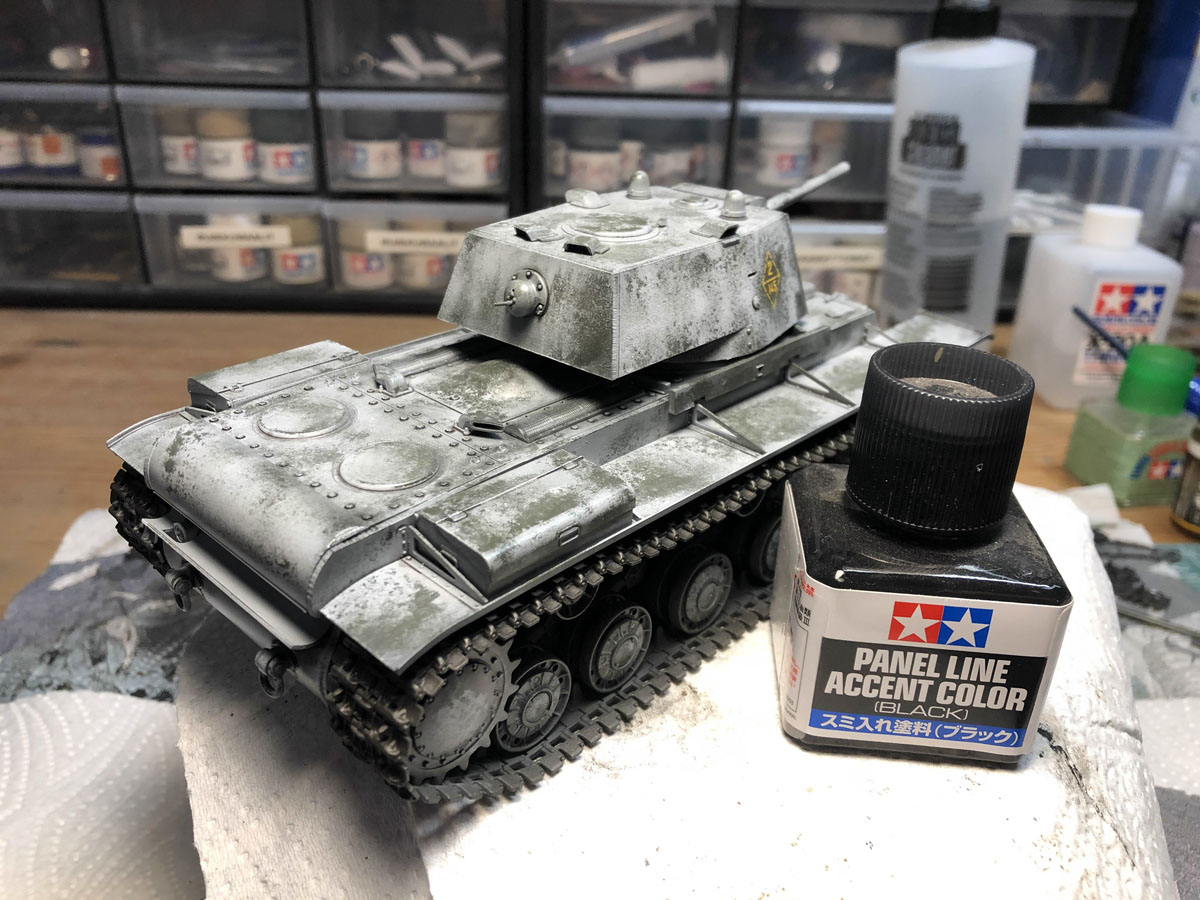
I usually start these kind of tanks with a panel liner. These Tamiya panel liners are easy to apply and can be applied gradually. One round usually doesn’t show much once it dries. I tried with grey panel liner first but quickly switched to black as the grey didn’t show at all.
I’ve sometimes forgotten to add the mud to the hull. I’ve often used the Vallejo pigment fixer but don’t quite like it. It’s too thick and not very easy to apply little by little.
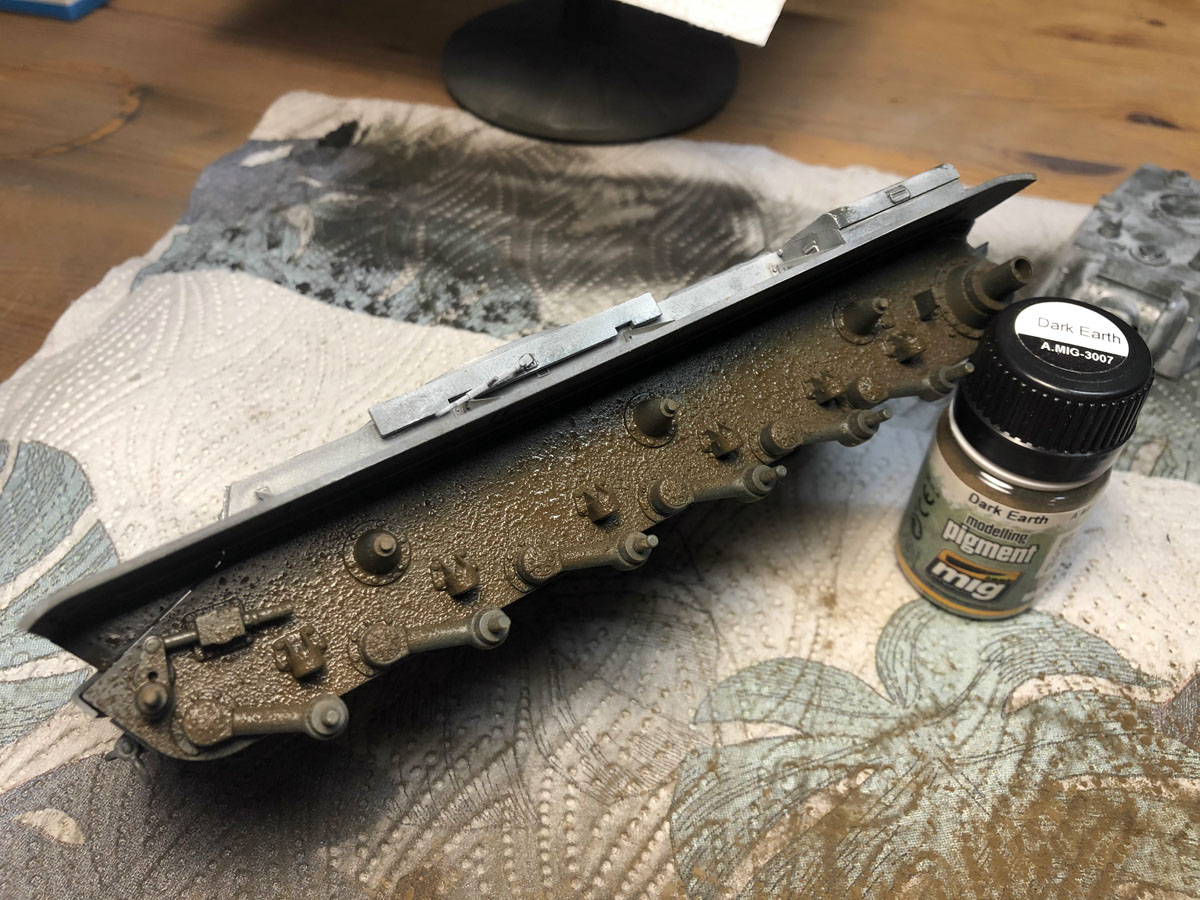
This time I decided to try with nothing but airbrushed thinner and pigments. Little by little I airbrushed a coat of thinner, gently tapped some Mig Dark Earth pigment from a brush, airbrushed more thinner and applied more pigment. I repeated this at least 4-5 times before it started to look good.
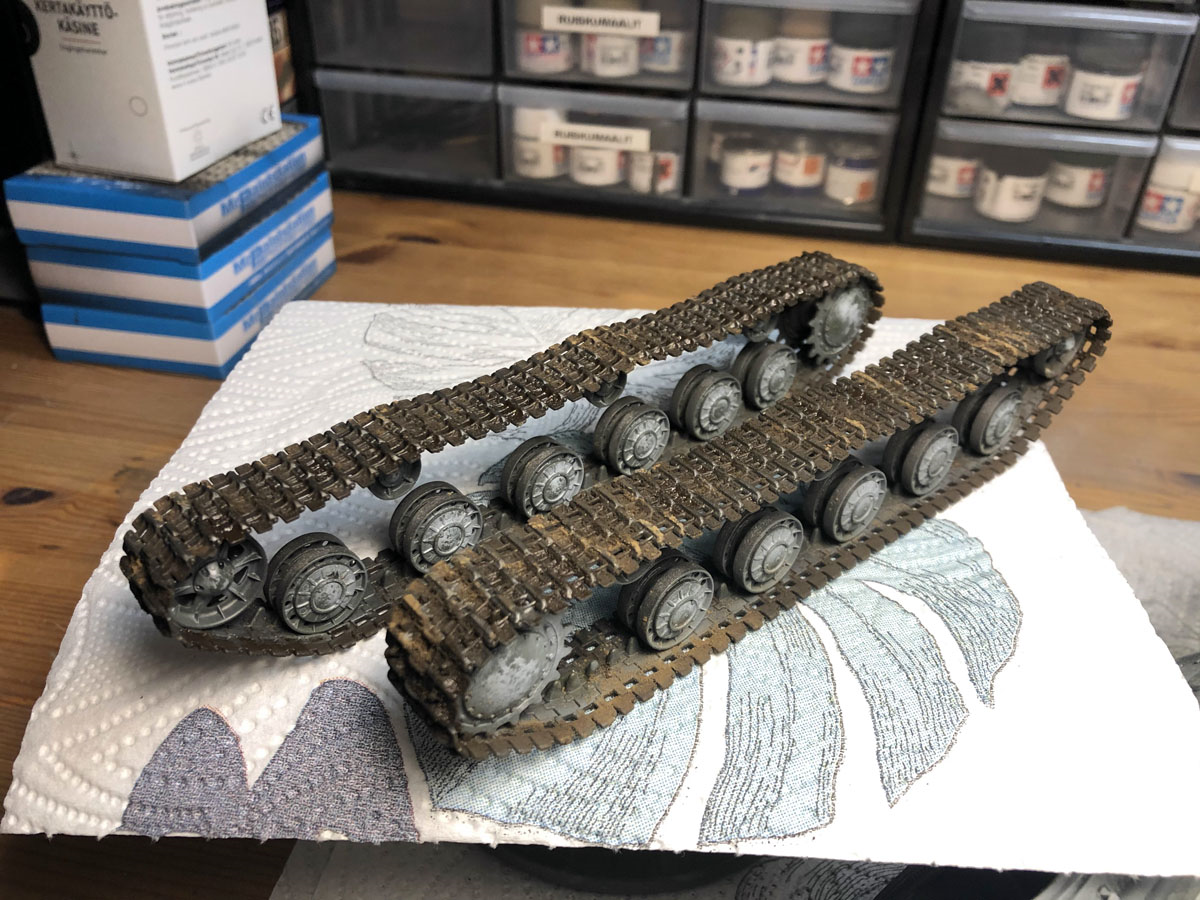
With the tracks I always use track wash as the pigment fixer. I used both the dark earth pigment and the dark grey pigment for the center part of the track as it’s often darker in photos due to oil, grease and all. Scrubbing the elevated parts of the tracks with a carpenter’s pen gives them a nice bare metal finish which shows better in the final photos.
I had planned to use the Mig oilbrushers I recently ordered for this kit but they still haven’t arrived. So I went for some rust wash and streaking grime next.
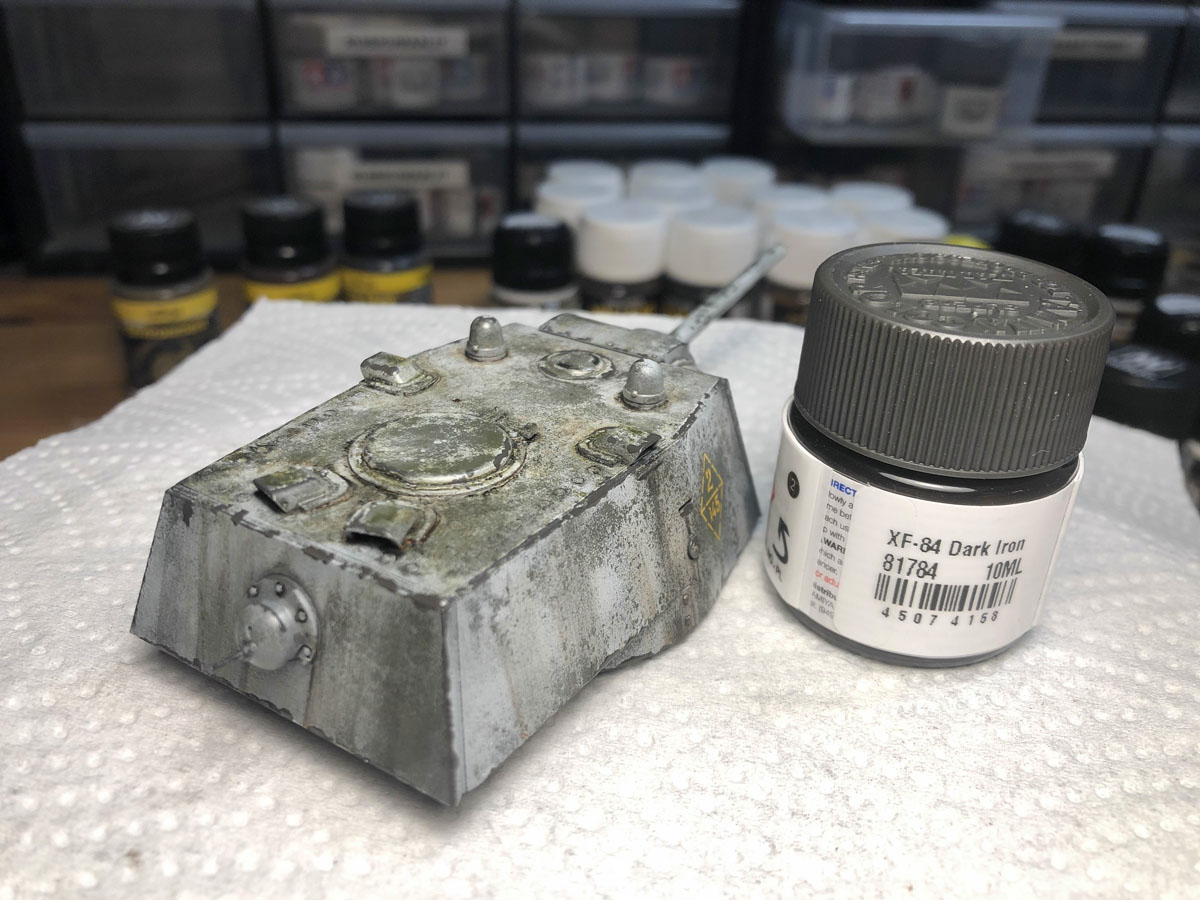
At this point I noticed I had totally forgotten all the chipping. I recently got some Tamiya XF-84 Dark Iron which I though would be good for this. Indeed. Although I still need to get some finer brushes and learn how not to add too much chipping.
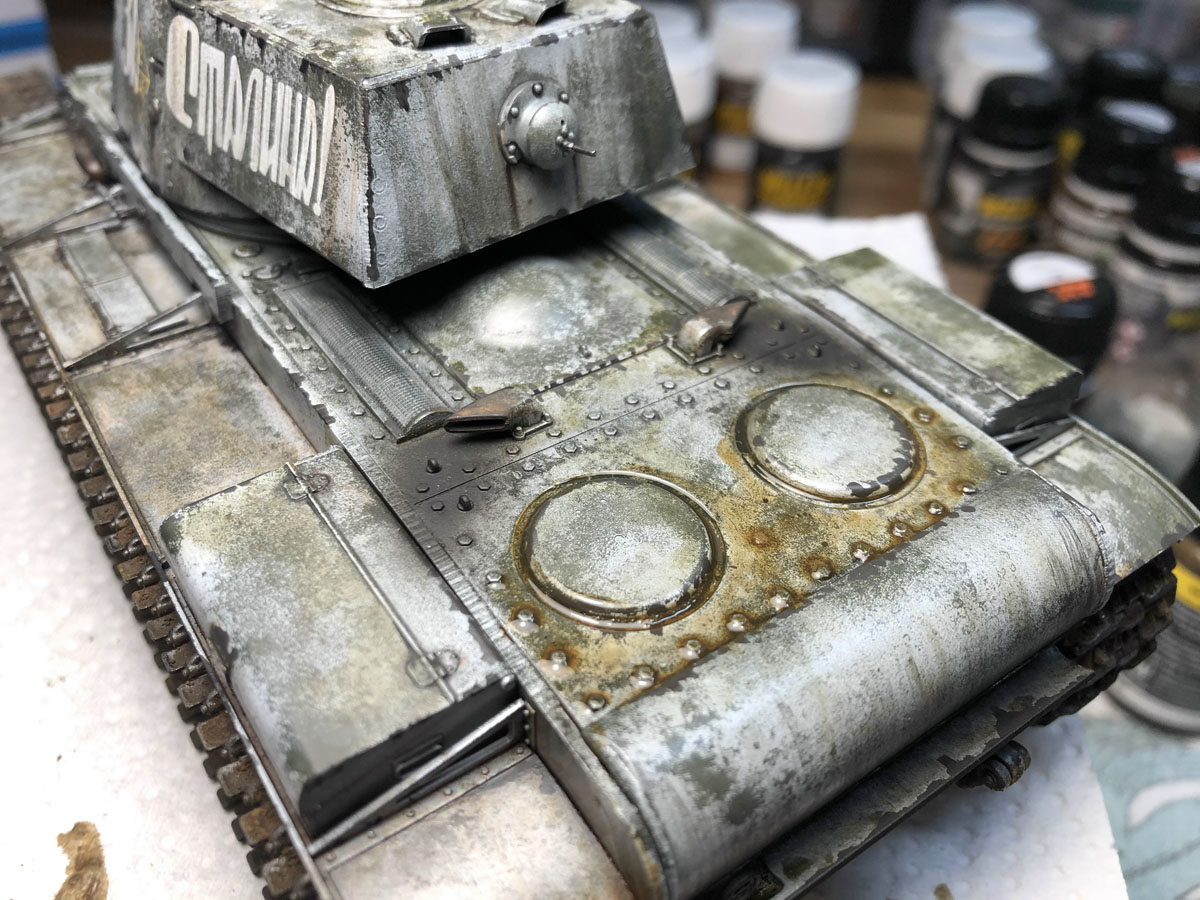
I tried to add some dark steel pigment to the exhaust pipes and gently airbrushed some flat back to the exhaust areas. This is the part of the build I’m most pleased with. So far I’ve always more or less messed up the exhaust pipes with too much of rust pigment but this is so much better. I also soaked the engine deck with Vallejo oil stains fluid. In the photo there’s still too much of it there and I used a dry brush to remove the excess.
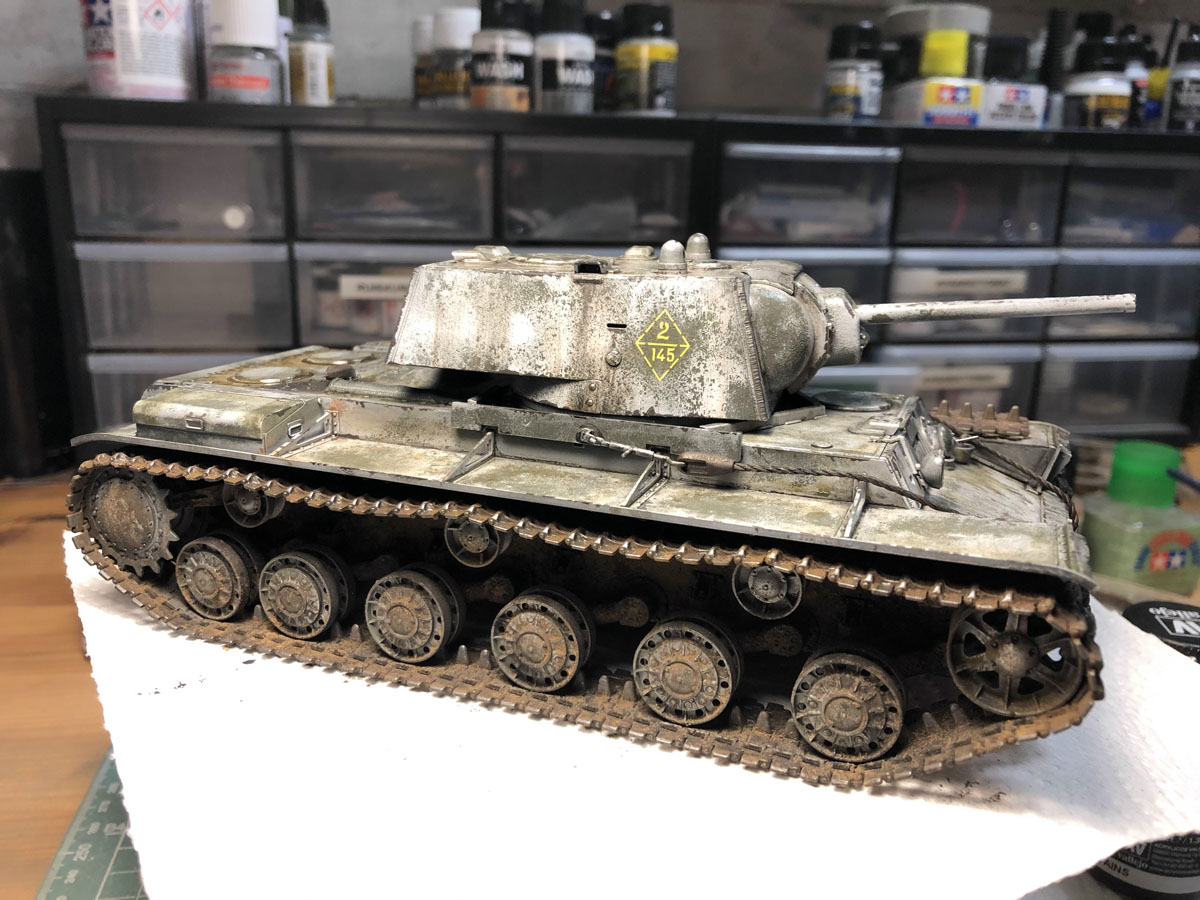
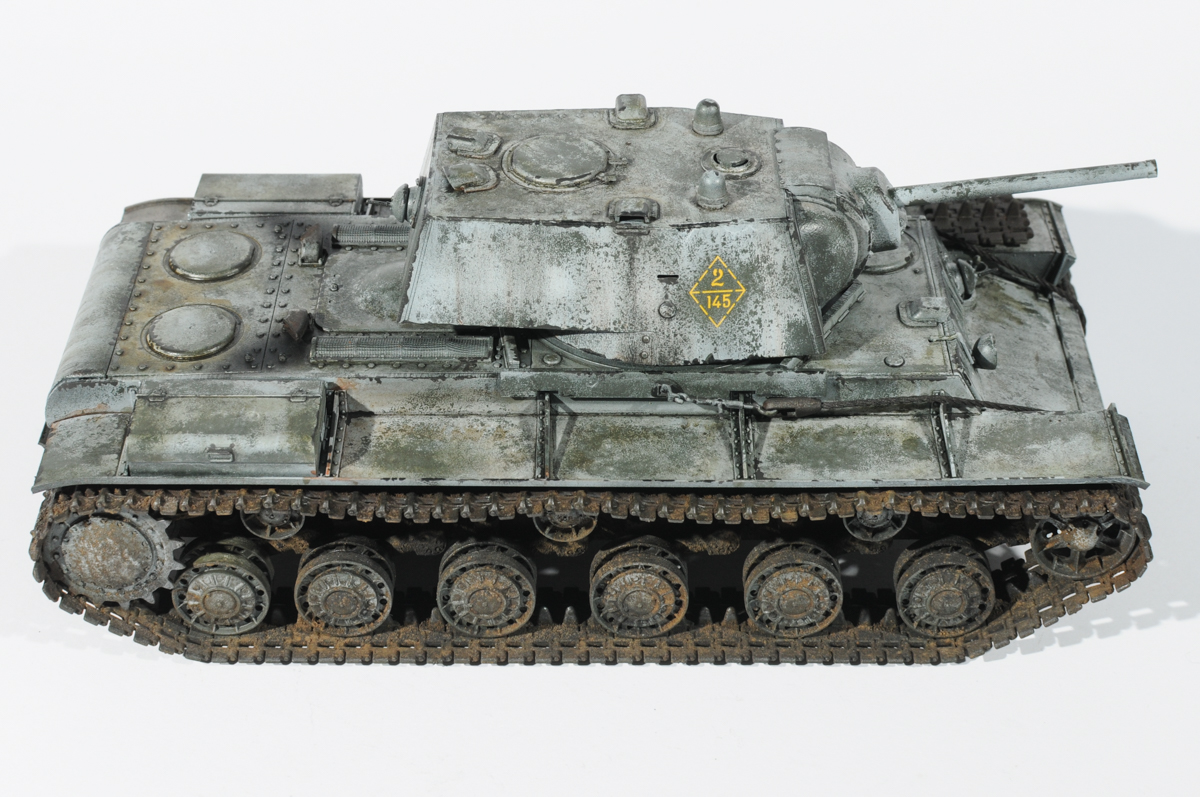
In the end I added the tow cables for good and decided to add some of the extra track links on the port side fender. I’ve always liked how they’ve added some of those details in World of Tanks. Also note the bare metal look of the elevated track parts in this photo.
All and all I was very happy with this kit and how it turned out. Soviet tanks are always the best for builders in training since you can’t trash them too much. During this project I started thinking about twisting the fenders and doing more that sort of damage to the tank. I didn’t apply the ideas on this tank yet but I will in the upcoming projects.
More kit details in Scalemates.com.
Cheers!